
Happy Sunday everyone! I hope you all had a fabulous
weekend.
Today I am going to be showing you 3 simple hairstyles for
you short hair ladies! (These work with long hair as well. Bonus!)
I love how easy my short hair is but I sometimes feel like I
am always doing the same thing with it every day. So I played around for a
while to find some different hairstyles that can be done just as fast but still
give me the look that I actually went the extra mile on my hair. So let’s jump
right into it.
You can do any of these with straight or curly hair. My hair
is usually in messy curls so that’s what I’ll be working with today.
1. Twisted side
This little twist took me a minute to master but I finally figured
out the trick!
I start by taking 2 pieces on one side of my hair.


I then twist each separate piece AWAY from my face. Make sure
you twist each piece the same direction, away from the face. That is the trick.

I then twist each piece over the other until I run out of
hair.

I then boddy pin it back and you’re done!

2. Braided half up
2. Braided half up
This is similar to the twisted side but instead of twisting
you braid and on both sides.

I start by braiding one section of my hair (as you can tell
I changed my part the middle), this time I will grab my longer pieces so that
it can reach the back of my head after braiding.
I then do the exact same thing on the other side until I
reach where my last braid ended.

I pin both sections together so they meet on the back of my
head.

I fix my curls and I am good to go!

I fix my curls and I am good to go!
3. The 3 tuck
The next one takes a minute to get just right but once you
master it, it turns out awesome! This is especially awesome for layers!
First you section out 3 pieces at the bottom of your hair
and section them off.


Then start pinning. I twist and pin different sections making it look like an up do.
I like to leave out a few pieces from the front.

I make sure all pieces are how I want them and spray for
hold.


I hope these are useful for some of you because I absolutely
love them! Let me know if you tried any of these out and if they worked for
you! Thanks for checking in!
Love Always,
The Crazy Collards
Hey everyone! I hope you are all having a fabulous weekend! Today I wanted to show you a super simple holiday makeup look. This can be worn day or night and literally takes 10 minutes at the most to do! I'm not sure if you guys enjoy these kinds of posts but they are my favorite to do so I hope you enjoy! (:
Alright, the first thing I do is make sure my face is clean and moisturized!

The next step really helps speed the process up and helps make everything simple. I am going to start off by using a cream highlight and contour. To achieve this I am using Revlon's Photoready Concealer, I use a shade thats about 2 shades lighter than my foundation. To contour I used NYX HD Concealer, this time I used one 2 shades darker then my foundation. I then used my regular foundation (recently I went back to an oldy but a goody, Revlon Colorstay). I blended everything out using my Real Techniques Sponge.

Next I quickly threw on some blush, and highlight and did my eyebrows. You can see me doing this in my "Everyday Makeup".
I am in love with this eye look for this winter. It is so simple and can pretty much be worn with ANYTHING! I start out by using my Urban Decay Naked 2 palette. (I only do my right eye so you can see the difference)
I start off by using the shade "Tease" and blend that all over my lid and into my crease.


I then spray a flat shader brush with a makeup setting spray and pick up the color "Half Baked". I pack this all over my lid. Spraying your brush helps to intensify the color.


With a more defined crease brush I used the color "Snakebite" and focused that into the outter "V". I then took a blending brush and make sure everything was blended together. I then went in with "Bootycall" and highlighted my brow bone and the inner part of my eye. The eyeshadow is complete!


The next thing I did was create winged eyeliner. I don't usually go for eyeliner but I felt like it really brings the look together and makes it look a little more glam.

I topped everything off with some mascara, and the eye look is complete! Simple right?

The final step to bring everything together is the lips. I wanted to do 3 different lip combos so you can have a choice for what you feel most comfortable in. I went with a nude, red, and a dark purple. I personally love me some dark lips but I know its not for everyone.
Here is the nude lip. I used ELF's lip crayon in "In The Nude", topped with Revlon's lipgloss in

Here is the red lip. I used NYX lip liner in "Auburn" followed by NYX Xtreme Shine lip cream in "Absolute Red".


The third and final look is the dark purple. I used NYX lip liner in "Plum" followed by NYX Simply Vamp Lip Cream in "Bewitching", and topped off with NYX Butter Gloss in "Devil's Food Cake". (As you can tell Courtney loves her some NYX lip products.)

Those are the completed make up looks! I hope you enjoyed and i'll be sure to do more makeup looks for you guys because they're my favorite! Have a safe weekend!
Love Always,
The Crazy Collards
Hello everyone! Okay I have finally had time to get this
blog up and going! Yay! First things first, I probably get the most questions
about my hair than anything else so I thought a lot of people would enjoy this.
I guess I will start off with my hair color and cut, I get
my hair done by my amazingly talented sister Kelsey Brewer (if you want contact
information please message me on Facebook.) I usually give her a picture of the
color I want and a picture of the cut I want, if I am wanting to change things
up. I love to try new things with my hair. I have been Blonde, Brown, Burgundy
& Black, I am not afraid of a little color.
Now the cut on the other hand is what I have trouble with.
It all started in 7th grade... I got a HORRIBLE haircut by some crazy lady at
Great Clips and now the front pieces surrounding my face literally never grow.
So every time I try and grow my hair out I end up hating it and always go back
to chopping it off. So I am a big fan of the long angled bob, and that is
currently what I have now.
So let’s begin.
I wash my hair 2 times a week, sounds gross I know but it’s
what my hair is used to so it doesn’t get greasy. If it every does have a
little grease I will not run to wash it, I live for dry shampoo. My favorite
being "Not Your Mothers, Freak Refreshing Dry Shampoo". When I do
wash my hair, I’ll wash it at night and sleep on it wet and the next morning it
looks something like this...

The first trick I use is I DO NOT BRUSH IT OUT. I know, I
know it looks like a horrible mess but leave it.
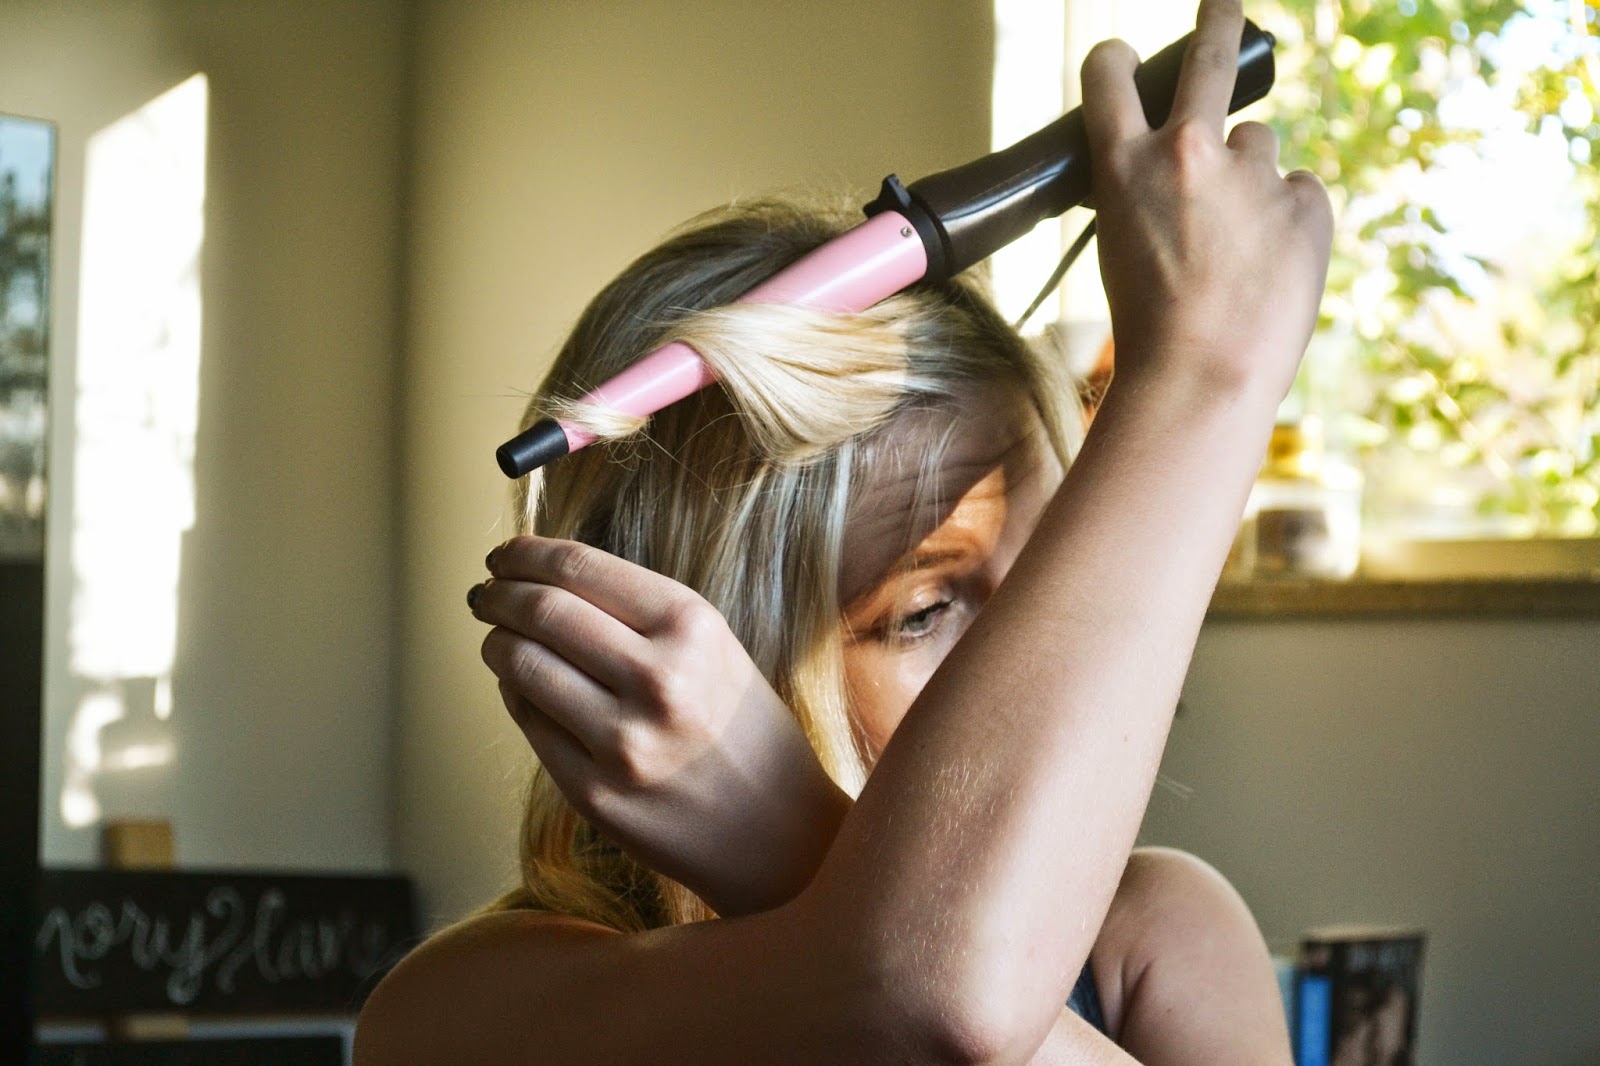
The next thing I’ll do is section out my hair, and begin
curling away from my face. I use a 1/2in curling wand because I find that this
is what works best for my hair at this length. I kind of hold like I’m about to
kill someone with a knife. Sorry not sorry. (; Holding it this way helps me get
the volume I want at the roots of my hair because the larger section is closer
to the handle. I keep curling away from my face on both sides until I meet in
the middle at the back of my head.

I just repeat this step until all sections are completed,
leaving out the two front pieces at the top section surrounding my face.


This helps to keep my bangs flowing away from my face all day long and gives me that "swoop" I like. I do the same with the other side of my hair so that both front sections flow away from my face.
After that I will finally brush out my curls. I love a more natural messy curl.

Next I add a few extensions into my front sections because like I said earlier, they do not grow so I like some extra hair in those sections to help fill in.

Now I back comb both front sections as well as the back section. Now my final trick to give off the illusion of fuller hair is I take a brush and back comb the bottom of my hair as well. I will back comb and then brush over the top layer so it doesn’t look like a crazy nest.


Now finally I will hairspray everything into place.

Best hairspray on planet earth. It literally locks everything into place without making it look crunchy. Your hair will not move with this hairspray. (I had to buy the mini size because its always sold out at Ulta)


And there is my everyday hair. It looks like a lot of steps
but it takes me about 5-10 mins to do. I hope you enjoyed this, and let me know
if you want to see more of these. I can do anything from different make up
looks to hair looks to outfit ideas. I am up for anything! Stay tuned for my 30
day challenge later this week as well as... MY HOME TOUR! Woot Woot. I know you
are all so excited! (; Thank you for taking some time to check out the blog it
means the world!! Love you all.
Love Always,
The Crazy Collards
Hello everyone! I hope you are all having a great start to
your weekend! Today I am doing my everyday make up because it seemed like a lot
of people were interested in it so here it is! Let me know if you have any
questions, enjoy! (:

Here I am with NO makeup, help me..
The face products

Okay so to start off I ALWAYS use a primer, not so much to
help my makeup stay in place but to add an extra layer of moisture to my skin.
I have extremely dry skin and I love the dewy look so my favorite primer at the
moment is L’Oreal Magic Lumi light infusing primer. As you can tell below it
kind of makes me look “greasy” but it comes together in the end and gives my
skin that extra glow that I love!

The next step is foundation. My fav is Covergirl outlast
stay fabulous 3 in 1. People this is AMAZING, if you haven’t tried it you need
to. Like now. I own M.A.C Studio fix fluid and would pick this over that any
day! To blend in my foundation I use a Real Techniques miracle complexion
sponge. I do not understand how people put on foundation without this. It’s similar
to the Beauty blender but half the price (come on who wants to pay $20.00 for a
sponge, not me). This bad boy is only $6.99! I dot my foundation on my skin and
then press it in with my sponge.

After foundation I go in with my concealer. For every day I
use NYX HD Concealer, this is THEE BEST DRUGSTORE concealer out, I swear! It
works amazing, not as well as my MAC Pro longwear concealer but I only use that
on special occasions. This concealer is defiantly worth a try and for only
$4.99 you can’t go wrong!!

I focus my concealer under my eyes

I set my concealer with a loose powder
Cheek products

Next I use blush, I don’t know if it’s just my skin or what
but I’m not a huge fan of blush. Maybe it’s because I just haven’t found that
right one but it never looks good on me, but when I do wear it I usually go for
my NYX powder blush in Amber. After blush I get to do my FAVORITE part,
highlighting. Seriously people if you don’t highlight your face you are missing
out. My Holy Grail highlighter is Stilas highlighting duo in Kitten. I get mine
at Ulta and if you ever see it in stalk you need to pick it up!! It’s so
gorgeous, but always sold out! I swear by this.


I love it so much! (:

That glow, I CANT TAKE IT!
Eyebrow products

The next step is life changing, seriously. I fill in my
brows. If you don’t do this you need to. It transforms your face and I promise you’ll
never look back. I use ELFs eyebrow kit in medium, I’ve tried tons of brow
products but I always go back to this. I just love it! It comes with a creamy
dark shade and a lighter powder shade.

Eye products

My last and final step is my eyes. I love to play around
with different looks on my eyes and this is where I tend to splurge on products
(Urban Decay, just have all my money.) My everyday eye is just quick and
simply. I start out by using NYXs nude matte shadow in Dance the Tides in my
crease. It’s just a very warm chocolate brown. Next I use Maybelline Color
Tattoo in, Bad to the Bronze and blend on my entire lid with my finger. After
that I use Urban Decays, Naked 3 palette and use the color Mugshot on my outer
v area. Then I went in with Naked 3 again and highlighted my brow bone and
inner tear duct with Strange. I topped it off with Covergirls bombshell volume mascara.

You can see I did the crease on my right eye (looks like I got punched I know) but it comes together


The angle I took the pictures at has a bad shadow in my right eye. That is not eye shadow I promise!

Love always,
The Crazy Collards
No comments:
Post a Comment